Easy Powdered Sugar Cookies


Need a great sugar cookie recipe for any holiday? Try these! They are the best and our family favorite… sweet and crunchy, personally better than any other I have tasted.
Easy Powdered Sugar Cookies
Sugar cookies are so versatile as they can be used to make every occasion fun! These cookies are different than most sugar cookies as they use powdered sugar instead of granulated sugar, giving them a soft, yet crisp texture. The recipe is a family favorite. (I have substituted gluten free flour and they turn out yummy too!) The recipe card in the first ingredient photo was handwritten by my youngest daughter when she was about 5 or 6. She is now 30, so explains why it is hardly legible! She still makes them every year, often a double batch. The original recipe was found in one of my first cookbooks, the 1982 edition of Betty Crocker’s Cookbook. This is about how long I have been making them too!
My parents owned a bakery when I graduated from high school for about eight years and my grandfather was also a professional baker. You could say baking runs in the family! I remember baking Czech breads and rolls with my grandparents when I was young as well and could barely reach the tabletop.
This recipe is ideal for teaching many basic baking techniques for those new to baking. Baking is a science. Cooking is a science as well. Many people prefer cooking over baking, as you can adjust many ingredients without a disastrous result. With baking it is important that you are accurate. I will attempt to give you a few pointers to help you be more successful!
Easy Powdered Sugar Cookies
Yield : 36 – 48 cookies
Ingredients:
1½ cups powdered sugar
1 cup unsalted butter, softened (two sticks)
1 egg
1 teaspoon vanilla
½ teaspoon almond extract
2 ½ cups all-purpose flour, preferably unbleached (gluten free works well too)
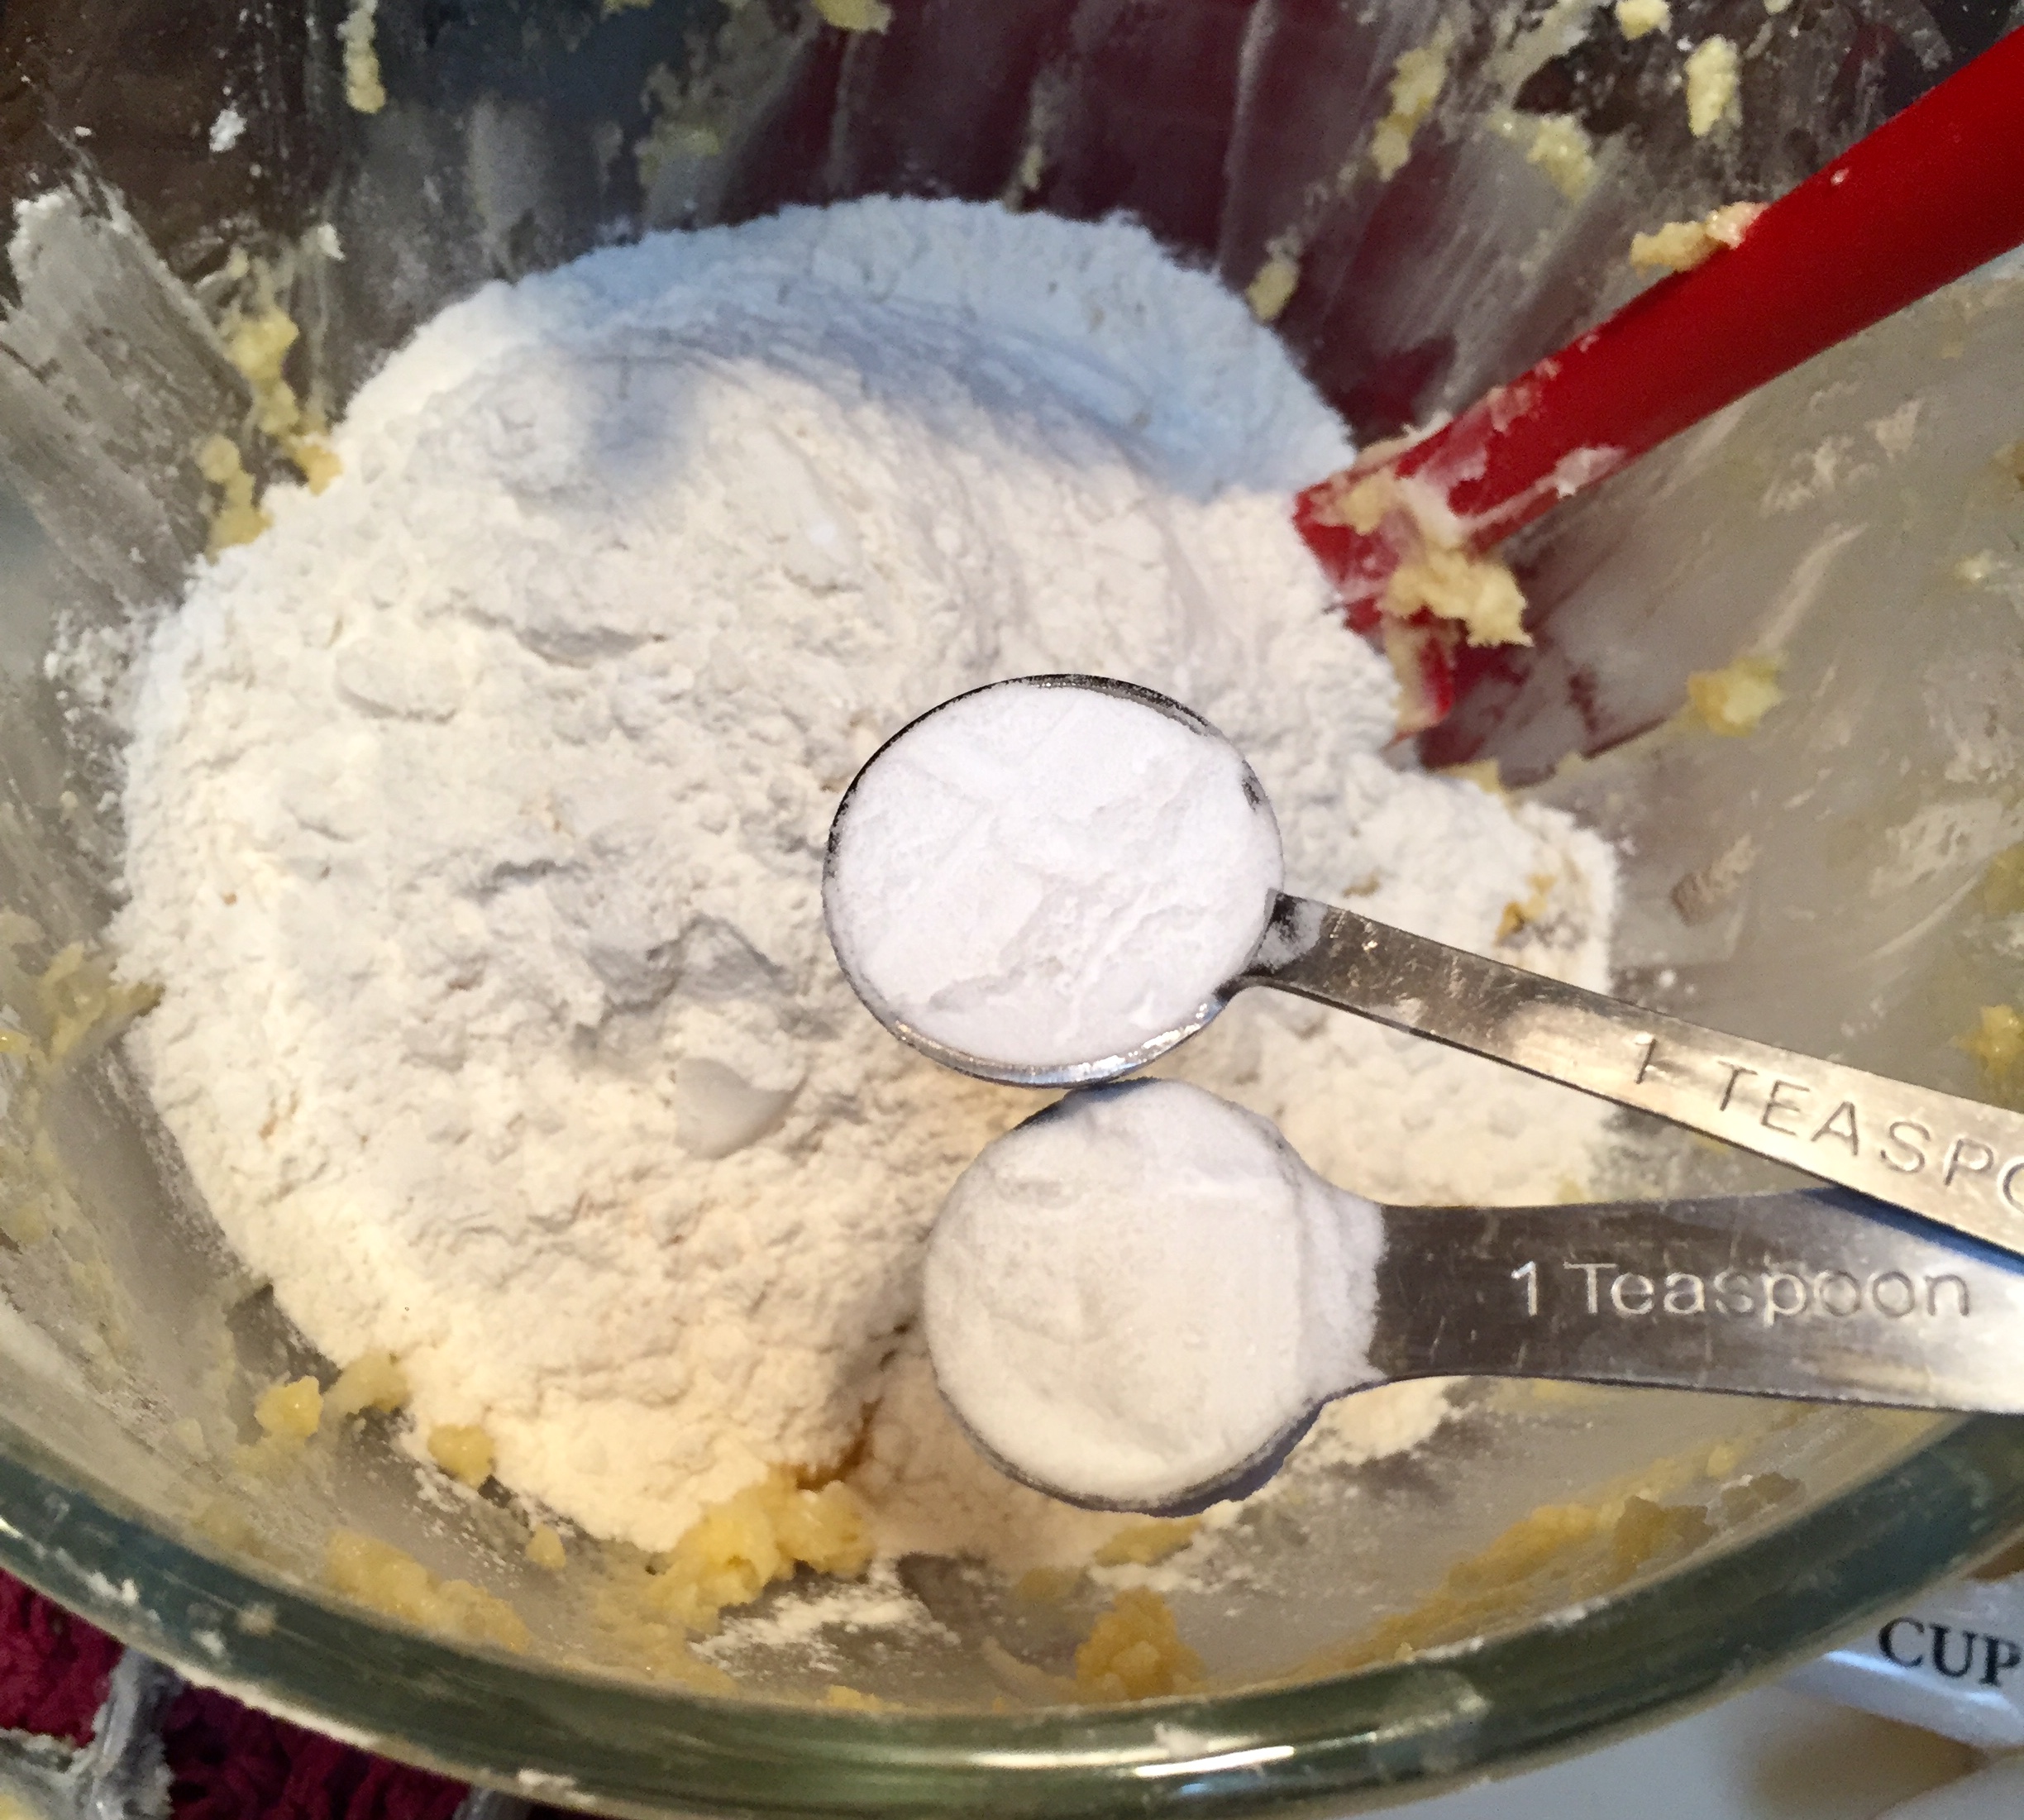
1 teaspoon baking soda
1 teaspoon cream of tartar
Glaze:
2 ½ cups powdered sugar
4 – 6 Tablespoons milk or Half & Half , may need more depending on consistency
Food coloring
Assorted sprinkles, colored sugars, etc.
Equipment needed:
Large mixing bowl or stand up mixer (or hand mixer with cookie mixing ability)
Rubber spatula
Measuring cups and spoons
Butter knife or flat-edged spatula
Waxed paper or plastic wrap
Rolling pin
Cookie cutters
Baking sheet
Bent-edged spatula
Cooling racks or paper toweling
Small bowl for glaze/frosting
Small wire whisk
Custard cups or small bowls to separate for colored glaze
Preparation part 1: Dough Prep
I usually like to have all my ingredients used for the first step ready and measured before I actually begin the process of cooking. This ensures that I don’t forget something if interrupted in the combining process.


When measuring dry ingredients like flour or powdered sugar, scoop and level the dry ingredient into a dry measuring cup and overfill it. Then use the flat back of a butter knife or flat-edged spatula to level off the excess. (Note the photos above) No, you shouldn’t dip the measuring cup into the flour and shake it off! This compacts the flour and may not be level either. My foods students used to get mad when I corrected them too. It’s a learning curve. Remember … baking is a science and an extra 2 – 3 Tablespoons of flour will make your product dry or alter the texture. Believe me…doughy cookies are not the result you want!


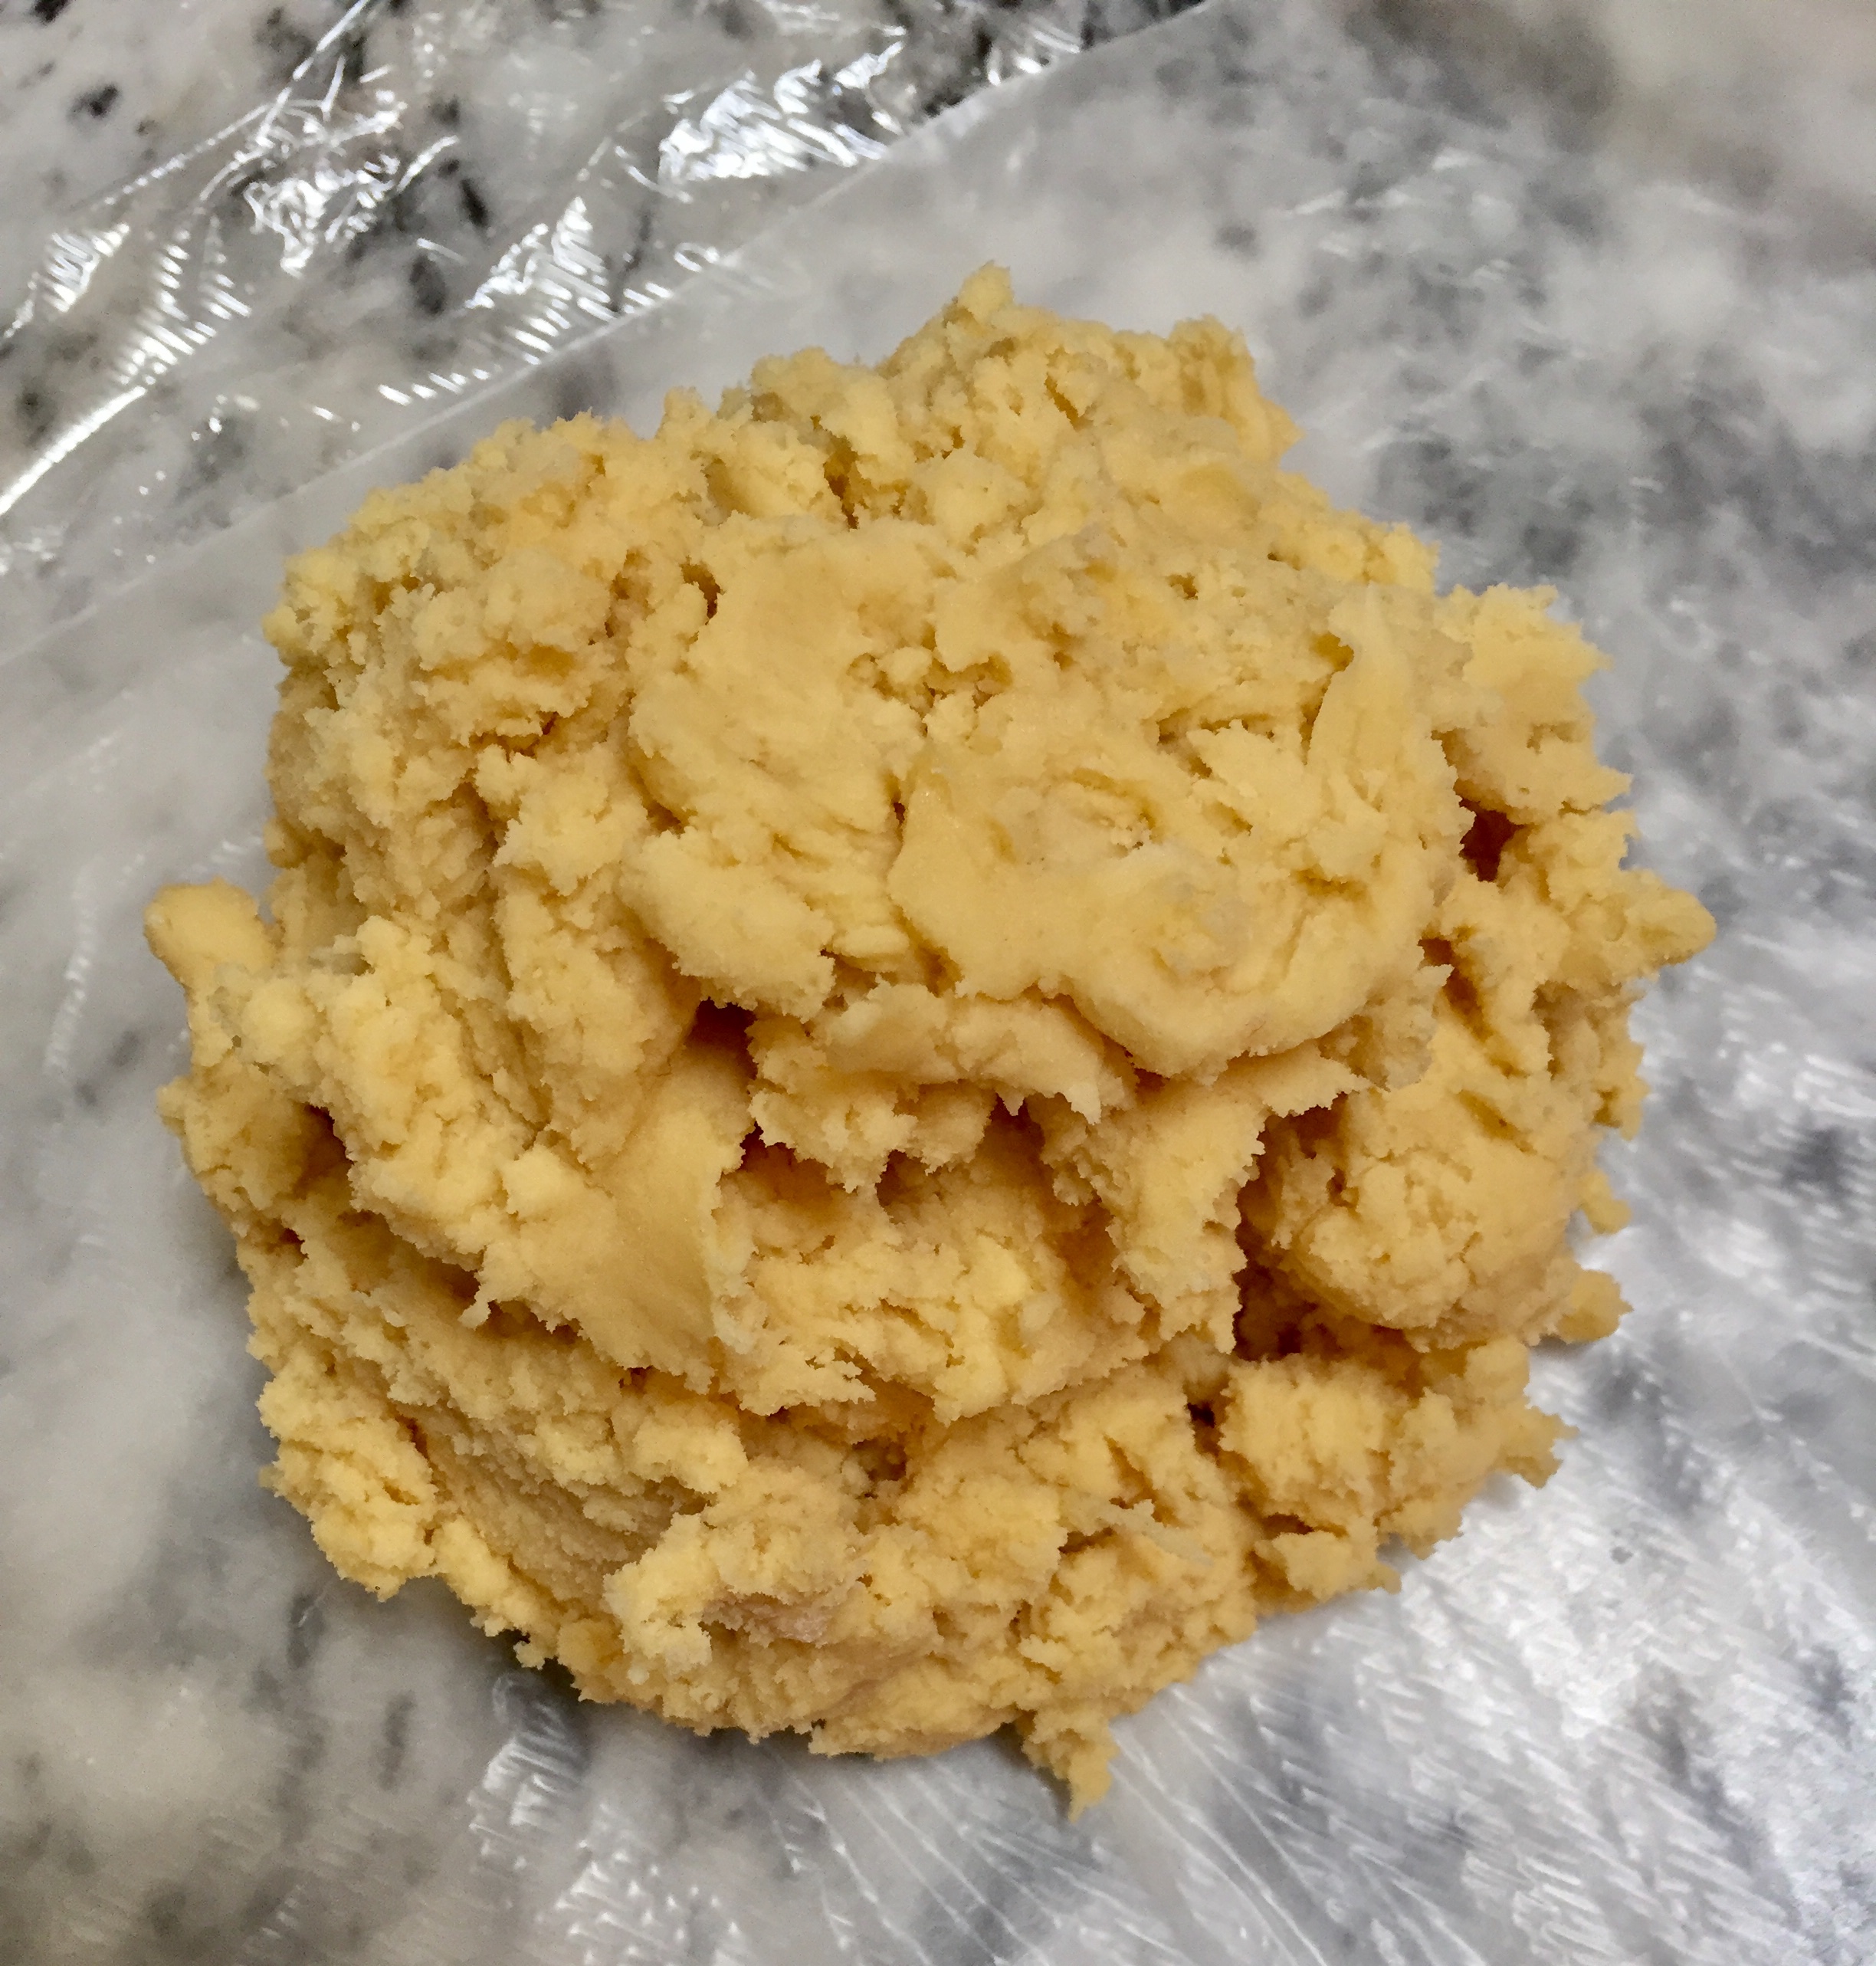
Cream together powdered sugar, butter, egg, vanilla and almond extract. Creaming is a process that incorporates air into your product and will affect the texture of your final product. Cream only until the butter and sugar are combined and a creamy texture ~ 1 minute on medium high speed is adequate. Start mixer on low speed until dry ingredients start to combine, then increase mixer speed gradually to avoid a cloud of dry ingredients flying everywhere! (If mixing by hand press the butter and sugar mixture against the side of the bowl continuously until combined well.)
Add premeasured flour, baking soda and cream of tartar. Cream of tartar is a mysterious ingredient that will give cookies added texture by preventing sugar in cookie dough from crystallizing. It also provides a subtle zing to the final flavor. I told you baking was science! Blend dry ingredients with sugar mixture thoroughly until a smooth texture is formed, ~ 2 minutes (Note picture above). Resist the desire to mix it to death as this will also over develop the gluten formed in your baked good and result in a rubbery texture.
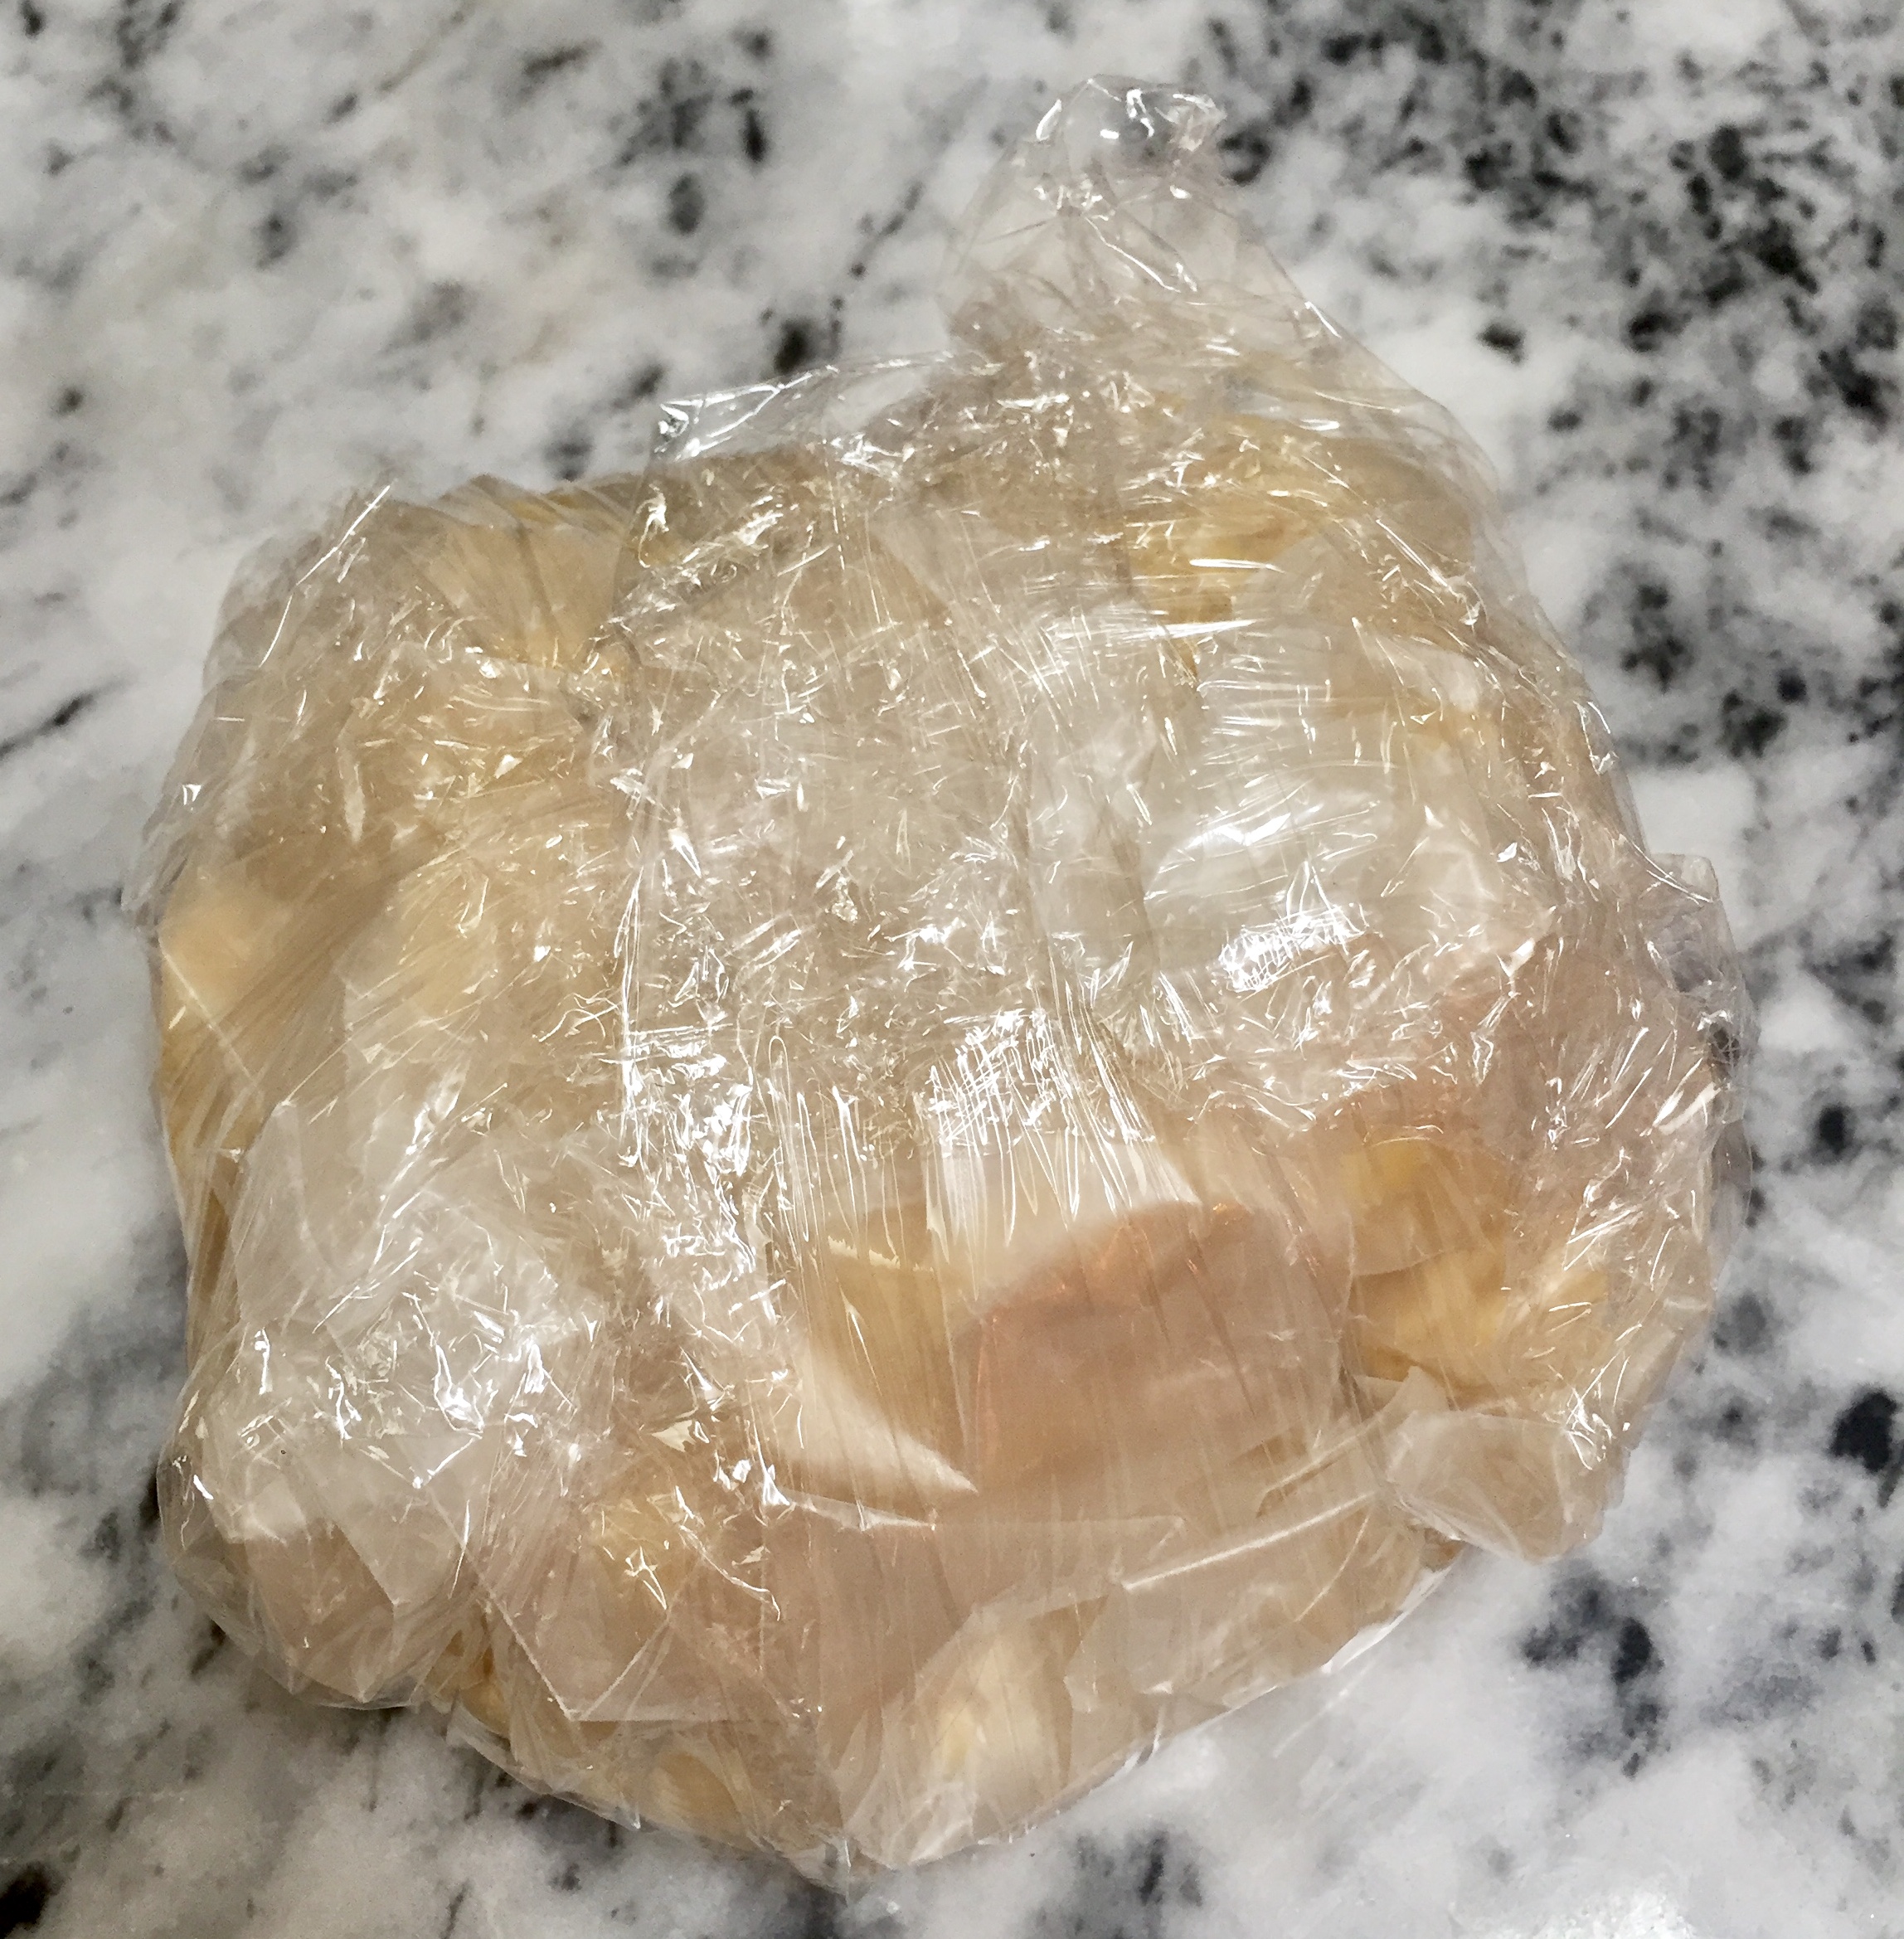
Tear a piece of waxed paper (or plastic wrap) about a foot long and scrap dough onto the center. Form dough carefully into a ball and wrap well. Place in refrigerator at least 2 hours. Dough can be made ahead and refrigerated, however, it will need to be removed ~ an hour prior to using to soften and warm up a bit. Dough that is warm will be sticky and difficult to use. Dough needs time to rest and allow flour proteins to absorb liquids. Again… baking is a science, but a fun form of science.
Preparation Part 2: Cookie Baking and Decorating
Preheat oven to 375 F.


When dough is slightly soft around edges of ball, unwrap ball of dough and cut in 2 - 3 equal sections. Remove one section and place other two back in refrigerator while rolling. Place dough on top of one piece of waxed paper or on a silicone matt, then place another piece of waxed paper on top of ball. No flour will be needed which won’t change flavor of cookies. If dough sticks, use a small dusting of powdered sugar and flour to prevent sticking instead of plain flour. Press dough down with hands to about 1 inch thick. With rolling pin or 1 ½ inch thick dowel rod, roll dough evenly to about ¼ inch thickness.


Using cookie cutters for the holiday occasion, cut shapes out trying to make each cookie as close to next cookie as possible. Placing close together will avoid extra rolling and manipulating of dough resulting in a better texture cookie. Remove cutters and cut cookies placing them on a cookie sheet lined with either parchment paper or a silicone baking matt. I used both during the baking process and found the silicone matt baked cookies a bit slower and texture was softer than the parchment paper cookies. Lay cookies out on pan leaving approximately 1½ inches between cookies. Depending on size of shapes, each tray can hold about 12 – 16 cookies.
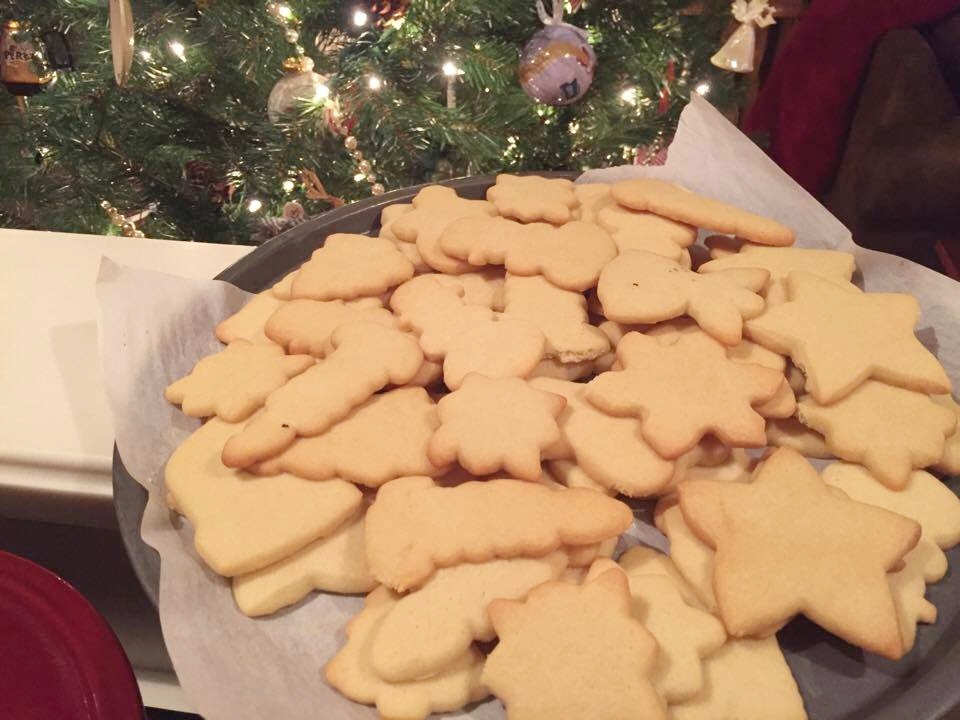
Bake each sheet of cookies for about 10 – 12 minutes. I usually set timer for 10 minutes remembering that additional time can be added, but not subtracted. Cookies should be starting to turn a delicate gold on edges. Try to prevent over browning. All ovens are different and some run hotter than others. This is why I set timer for lower amount of time specified, as I know my oven runs hot. Cool on pans for about 10 minutes before moving to avoid breakage.
Again, powdered sugar is a dry ingredient requiring a scoop and level technique using a dry measuring cup. Vanilla can be added directly to the measured sugar. Measure ¼ cup half and half into a liquid measuring cup. Add half of the liquid to powdered sugar and use wire whisk to start to stir. Tap whisk on edge of bowl to remove thick goo. Add a bit more ½ & ½ and continue mixing process, thoroughly mixing each addition of liquid. Add last 1 – 2 Tablespoons one at a time.
The icing on a sugar cookie is meant to compliment the cookie flavor not mask it. I find icing should be more of a thick glaze texture rather than a cake frosting consistency. Icing should run from a spoon slowly. This allows icing to have a thin coat and dries quickly. Sprinkle lightly with assorted sugars or sprinkles to develop the cookie style you desire. Remember a little goes a long way when frosting and sprinkles are concerned. I also use drips of a variety of colored icing to design my cookies. Iced cookies are then placed on a piece of waxed or parchment paper until completely dry. Then arrange on plates or put in a loosely covered plastic container to stay crisp and prevent sticking of frosting. I often place small pieces of waxed paper between layers of cookies in the container as well.