Baked Arancini... Rice Balls
Baked Arancini… Rice Balls

Got leftover creamy risotto? Making this yummy, low fat Italian appetizer is a great way to use up those leftovers! Baking is an easier and more nutritious preparation than deep fat frying as well… Bon Appétit!

Baked Arancini…. Rice balls
Yield: 4 servings
Ingredients:
- 1 ½ - 2 cups leftover risotto
- ½ cup all-purpose flour
- 1 egg, beaten
- 1 cup panko breadcrumbs
- ¼ teaspoon garlic powder
- ½ teaspoon dried oregano
- ½ teaspoon dried basil
- ½ teaspoon kosher salt
- Dash black pepper
- Vegetable oil spray
- 1 ½ cups marinara or favorite pasta sauce
- Garnish: fresh basil leaves
Equipment needed:
- Dry measuring cups
- Measuring spoons
- Mesh strainer
- Small cereal bowl
- Two small plates, 4 – 6 inches
- #40 ice cream scoop or disher (~2 tablespoons portion)
- 9 x 13 baking pan
- Parchment paper

I love risotto and always seem to make more than I need for a meal. Then it seems I throw out the leftovers a week later, as I didn’t remember to use them up with another meal. Quite the dilemma! While eating Arancini as an appetizer during my anniversary dinner at a local restaurant, I commented to my hubby that there had to be lower fat ways to make these luscious rice balls. Arancini are usually deep fat fried and served with pasta sauce, which makes them very flavorful because of all the fat. Unfortunately, not good for the waistline! My Creamy Risotto recipe from an earlier post was definitely the best way to start this culinary experiment! Other than leftover risotto, there are not many ingredients to complete this recipe… most of them staples in my kitchen too!


Preheat oven to 425 F.
To begin the preparation process, create an assembly line using all the dry ingredients and egg. Combine the panko breadcrumbs and dry seasonings on a small 4 – 6 inch plate and blend using your fingers or a fork until well combined. Pour measured flour onto a second plate and spread slightly to cover surface. Crack egg into a small bowl and whisk with a fork until creamy yellow and whites are no longer visible. Arrange in a line… egg, flour and bread crumbs last. Using a small #40 dipper or ice cream scoop will make the risotto portioning more consistent, but if you don’t have one of these use a measuring spoon and scoop out 2 tablespoons to give you the idea of how large each ball should be. Don’t need to be exact, but each should be the same size for even baking.
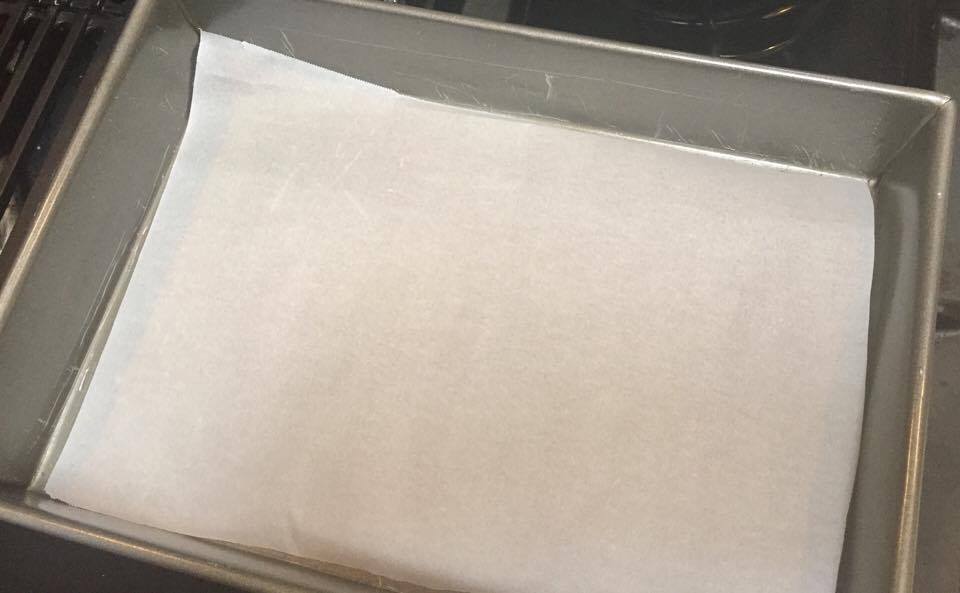
Ready the baking pan by lining your 13 x 9 pan with parchment paper. This will make clean up easier and prevent the balls from sticking and falling apart when removing them from the pan for serving.

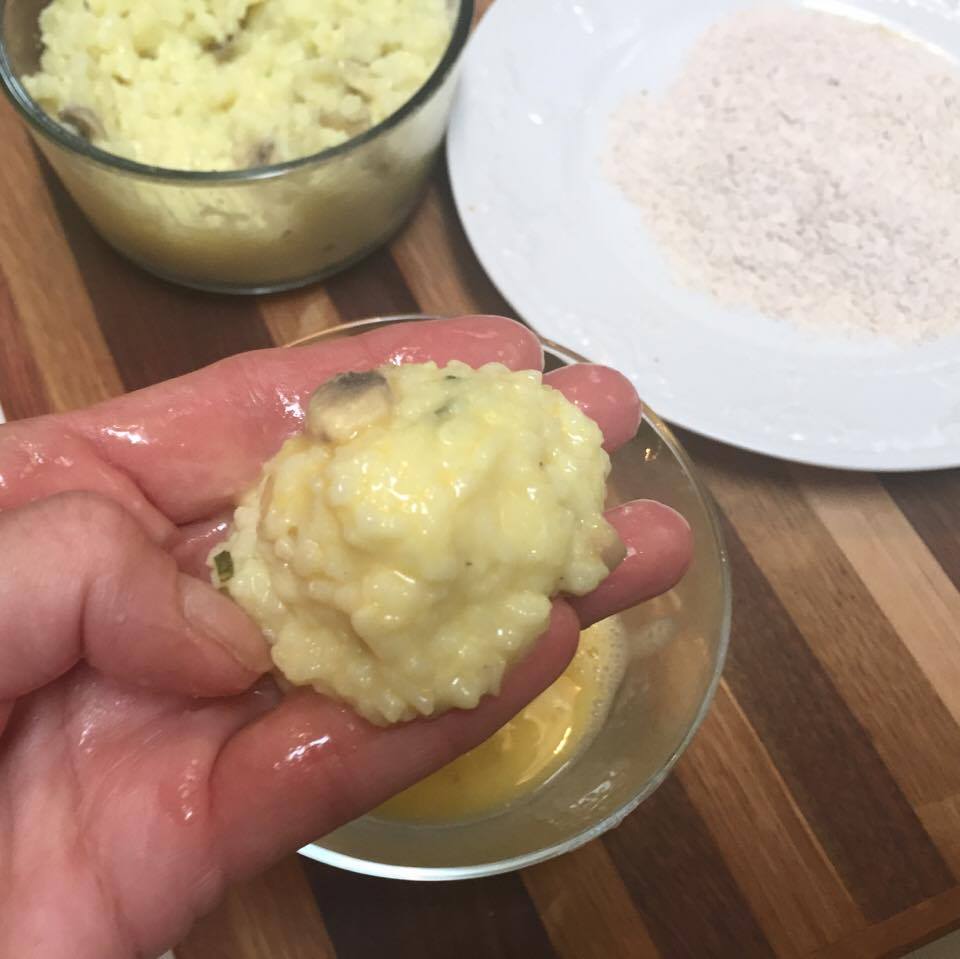


Make sure the risotto you are using in not super moist, as the balls will not stay together during the rolling process. (Remove excess liquid by placing risotto in a fine mesh strainer for 20 minutes prior to preparation.) To start the assembly of the rice balls, scoop up dry risotto and form into a tight ball using your hands. Carefully dip ball into egg without soaking too much egg into ball and roll into flour. Shake off excess flour.

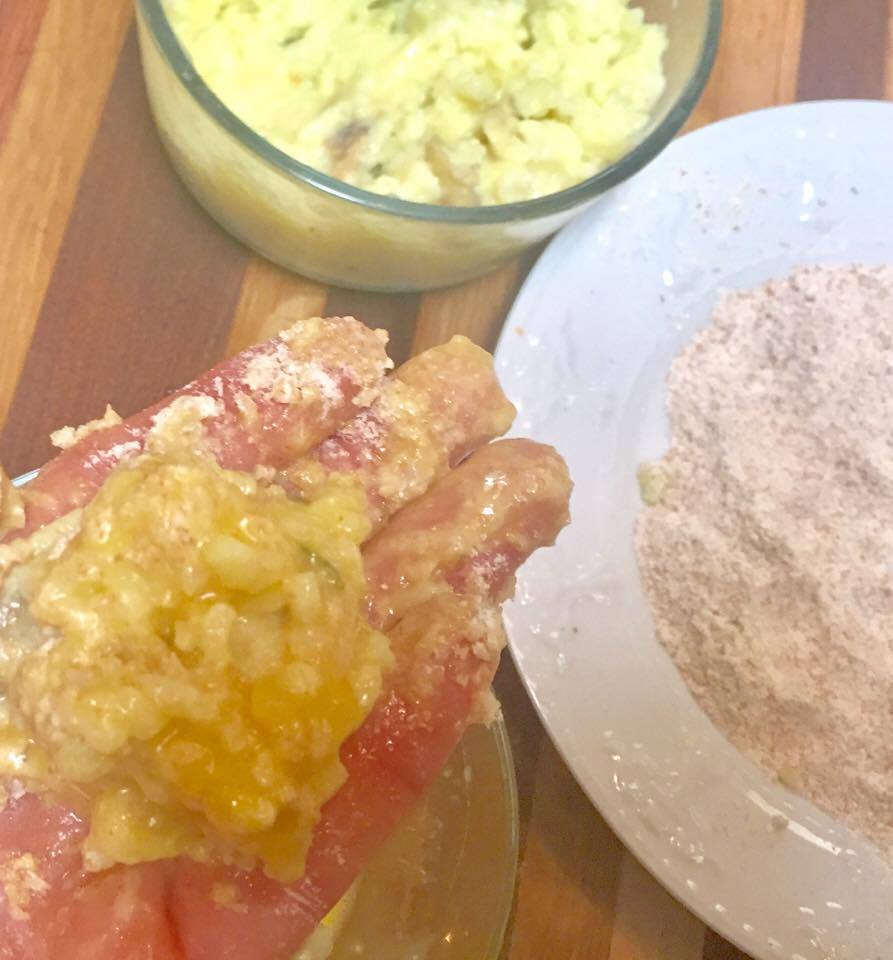

This part might get a little messy! After rolling the ball in flour, place quickly in egg and then in seasoned breadcrumbs. Working quickly will prevent rice balls from falling apart. If the do start to crumble, work breadcrumbs and flour into balls to reform and make more compact. Extra crumbs will add a bit more flavor too. When I make these I try to have one hand a “wet & sticky hand” and one “dry’ to improve handling process. An assistant cook also helps the process too!


Place breaded rice balls onto parchment paper. Depending on how much risotto you start out with will determine final count. I usually estimate I will get 8 – 10 rice balls out of 1-½ cups of risotto. After all the rice balls are panned, spray liberally with vegetable or olive oil spray to coat crumbs. This will help with browning of the final product too. Place pan into a preheated 425 F oven and bake for 20 – 25 minutes or golden brown.

Your arancini are ready when they are golden brown and coating is crunchy. Since you are not deep fat frying them, they will not be uniformly brown. You are saving a tremendous amount of fat and calories by not frying them! They will still be crunchy and so flavorful! To serve the dish, place 3 – 4 tablespoons of sauce on the bottom of a 4-inch cake plate and nestle two rice balls on top of sauce. Garnish with fresh basil leaves and your appetizer is ready! Enjoy!!
