Easy Homemade Strawberry Jam
Easy Homemade Strawberry Jam
Cooking 101
It's summer and that means fresh strawberries! Thought I would post my easy recipe since it’s Strawberry month too! Strawberries make the best jam and it's sooo easy. Use it on toast or instead of syrup on pancakes. May be prepared low or no sugar or with a variety of berries too!
Easy Homemade Strawberry Jam
Yield: 4 - 1⁄2 pint jelly jars (or 8 if you double the recipe!)
Ingredients:
1-quart fresh strawberries (not over ripened)
2 cups granulated sugar
2 tablespoons Sure Jell fruit pectin
1 teaspoon butter
Low Sugar recipe:
1 1/2 quarts fresh strawberries (not over ripened)
1/3 cup fruit juice, like Strawberry Kiwi or Cranberry
1 1/2 tablespoons RealFruit Low or No sugar pectin
1 teaspoon butter
Equipment needed:
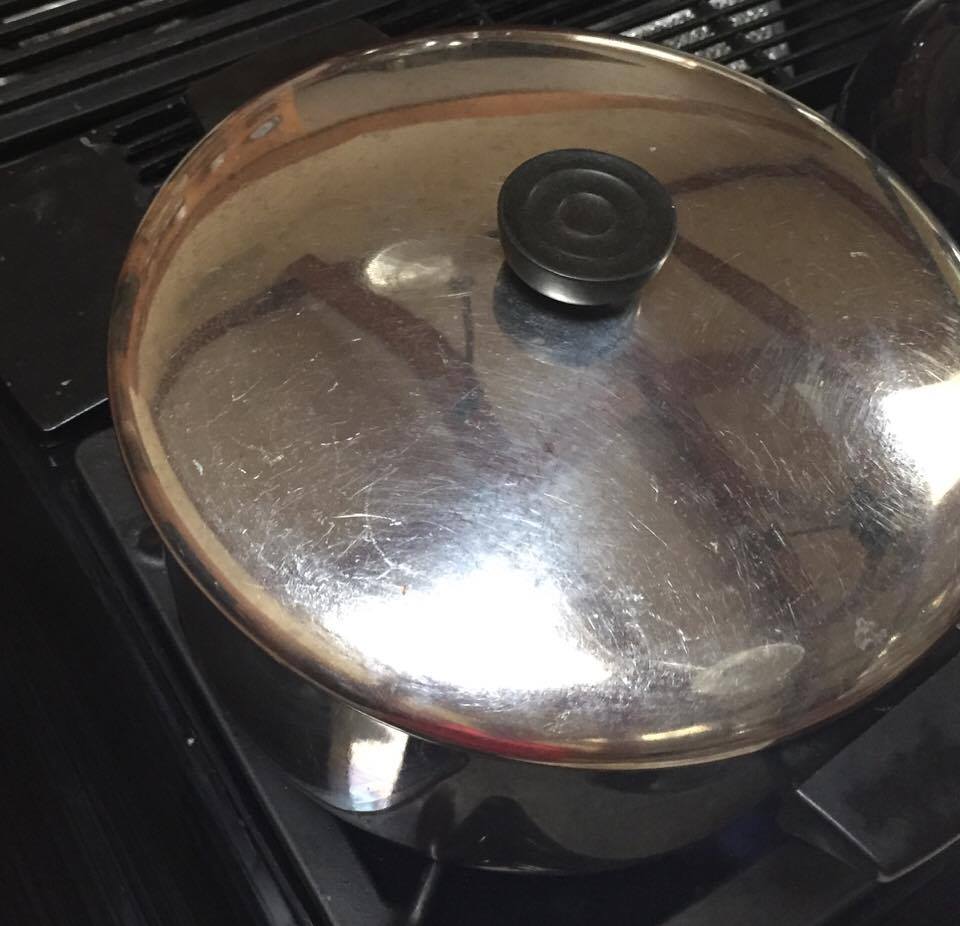
Large 5 – 6 quart pot with lid
Two – quart saucepan
4 – 8 glass 1⁄2 pint jelly jars with lids (or assorted cleaned small jars)
Small mixing bowl
Rubber spatula
Dry measuring cups
Measuring spoons
Stainless steel or wide mouth funnel
Ball jar lifter or tongs
Paring knife
Potato masher
Ladle
Small slotted spoon
Paper or tea towel
This is a great, simple recipe for making yummy jam! In the spring, strawberries are less expensive and available in the stores. I love making my own jam! Once you sample homemade jam you will never go back to store bought. Every few months I make a batch for my husband and I and usually wind up giving some to my kids too. It keeps well and doesn't require refrigeration during storage as long as you place it in processed jars. If you want you can store it in the refrigerator too and skip the sanitation process of boiling jars. More like a refrigerator jam! Now grab your paring knife and let’s learn how to make jam!


I do a fair amount of canning in late summer. Mostly tomatoes, pickles and jelly for the winter. It's a great way to use up a bumper crop of vegetables from your garden or farmers market. In the winter,there's nothing like opening a jar... few preservatives too! Whenever canning, sanitizing is vitally important. Boiling water kills bacteria and important when storing canned goods for long periods of time. The process is fairly simple and jelly doesn't require a second boiling after jar filling either.
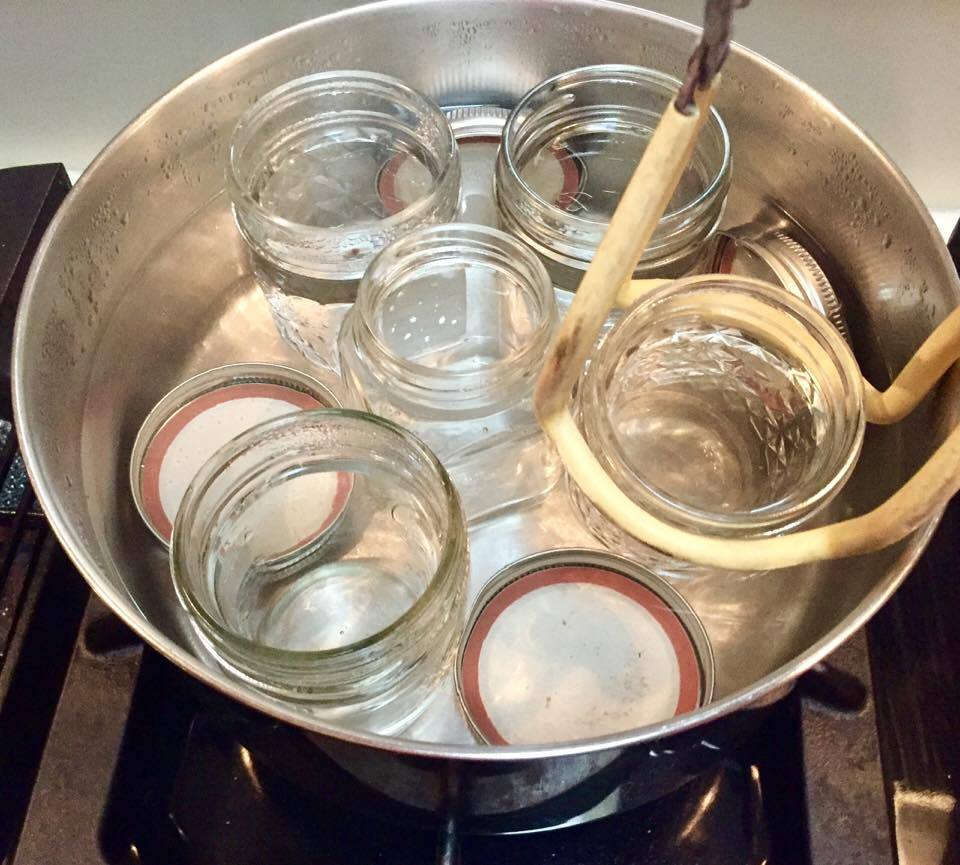
1) Use a large pot big enough to hold your jars and lids. Fill about 2/3 full with water and place jars in as shown above. Water will be inside and outside each jar. I find placing the jars first, before heating, reduces the amount of time dealing with boiling temperatures. Cover the pot with the lid and set over high heat to bring water to a boil. Allow jars to boil, covered for at least ten minutes as you prep your jam. When time is up, just turn off heat and allow jars to stay in hot water until you are ready to use them.
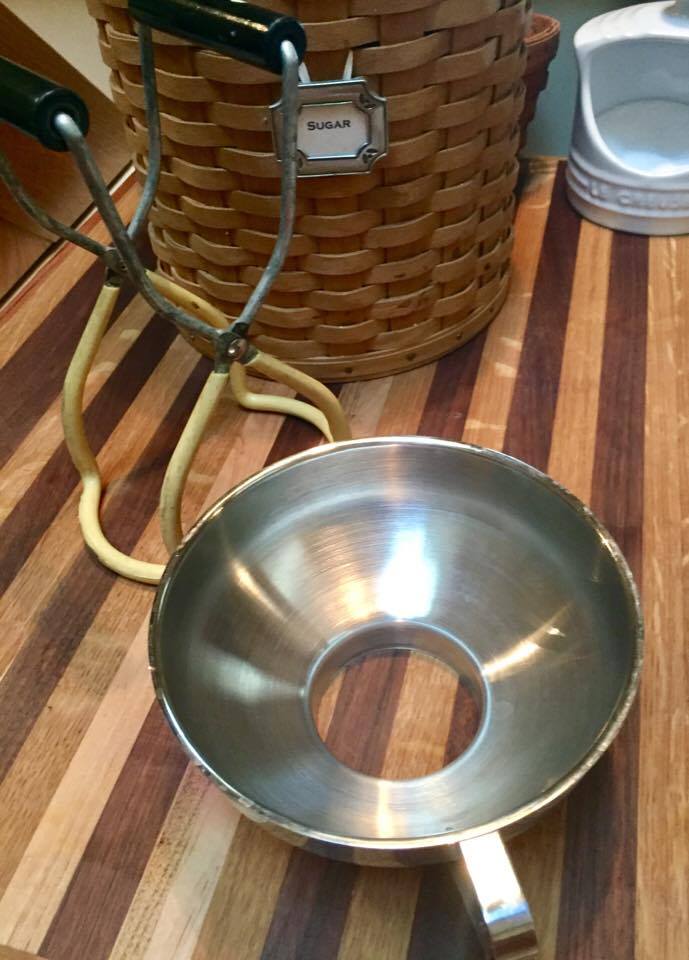
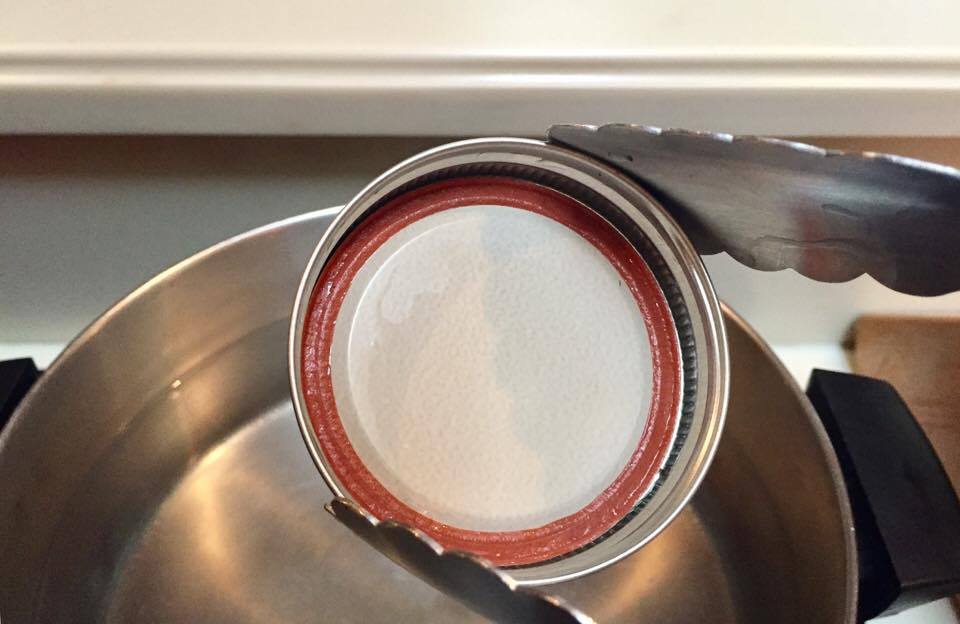
Two pieces of equipment that will make your job so much easier & safer... a ball jar lifter and widemouthed funnel. These two items will reduce the chance of being burned by hot water or jam. If you don't have these, a pair of long tongs will help lift jars. You’ll have to be careful filling jars without a funnel, but it can be done. Remove jars from water one at a time right before filling, to keep them hot, and remove lids with a pair of tongs.


Jelly Time!!
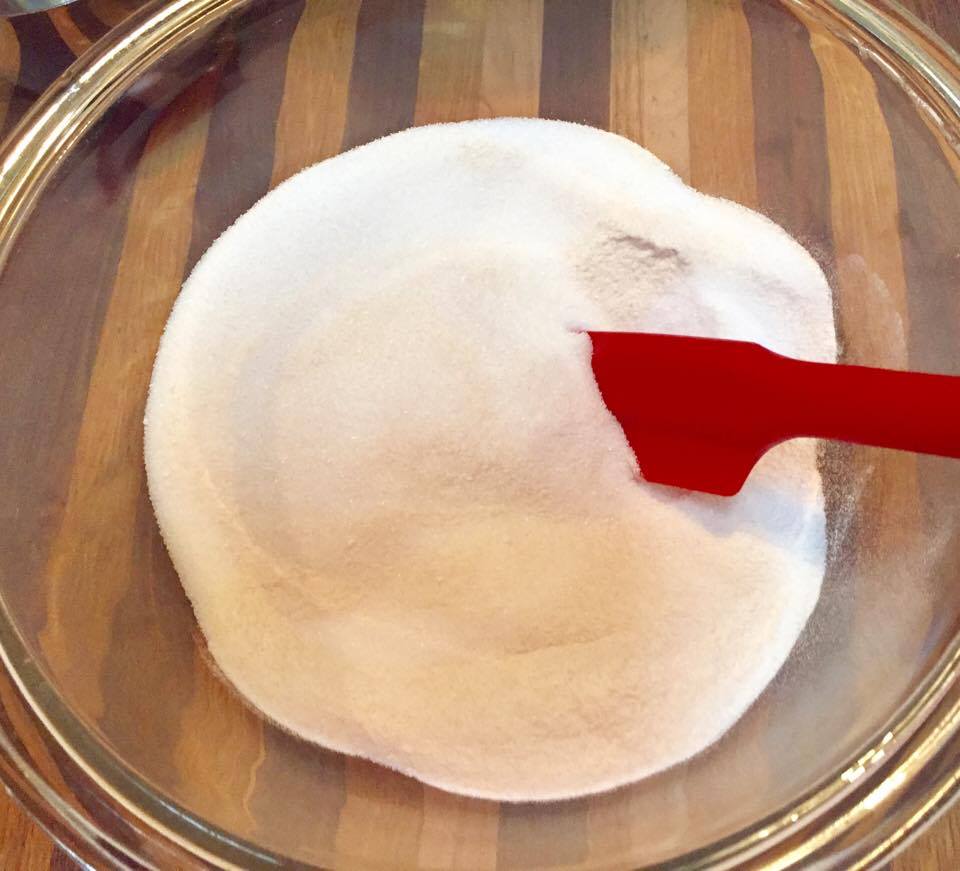
2) While your jars are boiling, prep the sugar and pectin by combining them in a small bowl. Use a spatula or spoon to blend. Sugar is of course important for flavoring your jam. Jam can be made with Splenda or other artificial sweeteners like Stevia. Aspartame and Sweet ‘n Low don't hold up to the high temperatures as well and create a bitter flavor in your jams or jellies. Pectin and sugar help to create the gel formation that holds the end product together. You can make jam without it, but the process takes longer and acid will need to be added to help breakdown the natural pectin in the fruit. It also will not be able to be stored unrefrigerated. Sugar also makes a much prettier end result and bright color. My solution is to use less sugar and make a jam the best of both worlds... up to you. Remember, cooking is a science and many factors come into play when you cook any food item.

Fruit Prep…
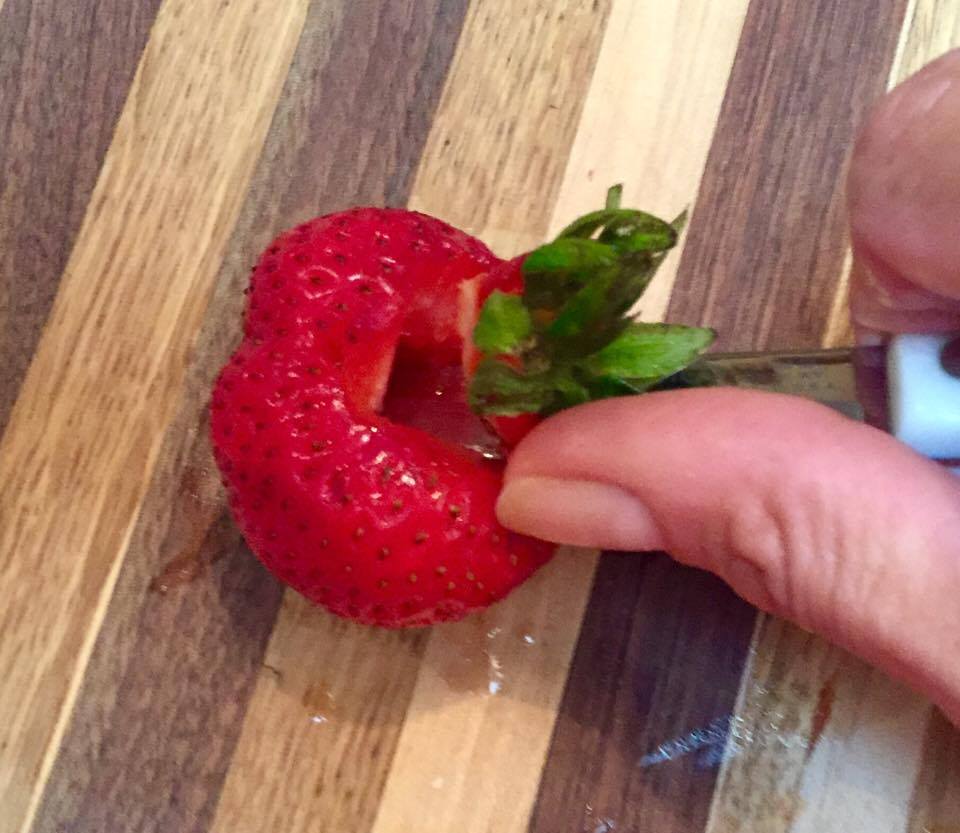
Strawberries are a delicate fruit that ripens and spoils easily. When purchasing strawberries for processing look for ripe fruit that is firm, but not over ripe. Over ripe fruits will not create the proper gel formation needed for jams. You need firm fruit to create the acid ratio necessary. Wash the berries under cold water before use too. Organic fruits may be available, but washing is still recommended to remove dirt and the stray bug.
3) Run water over the plastic clamshell of berries or place in a colander and set to drain for a few minutes. To cap the strawberry, resist the urge to cut off the tops and lose half your fruit! You can use a strawberry capper sold at specialty cooking stores or a paring knife works great too. To remove green leaves, place the point of the paring knife at the edge of the greens, insert slightly and rotate carefully to ensure only cap is removed, as shown above. Many ripe strawberries will be slightly hollow in the center making this process a bit easier.
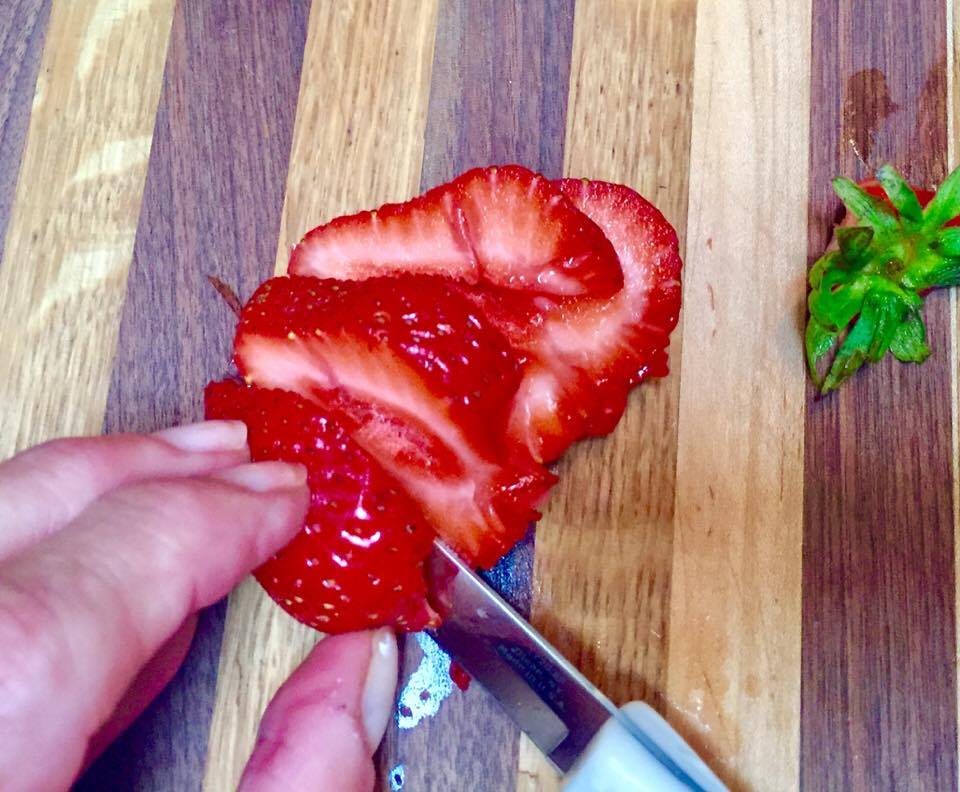
4) After capping, slice berries into three or four slices depending on size. If you want to cut once vertically that is fine, but there Is no need to chop them as the cooking process softens fruit for great mashing.


Time to cook…
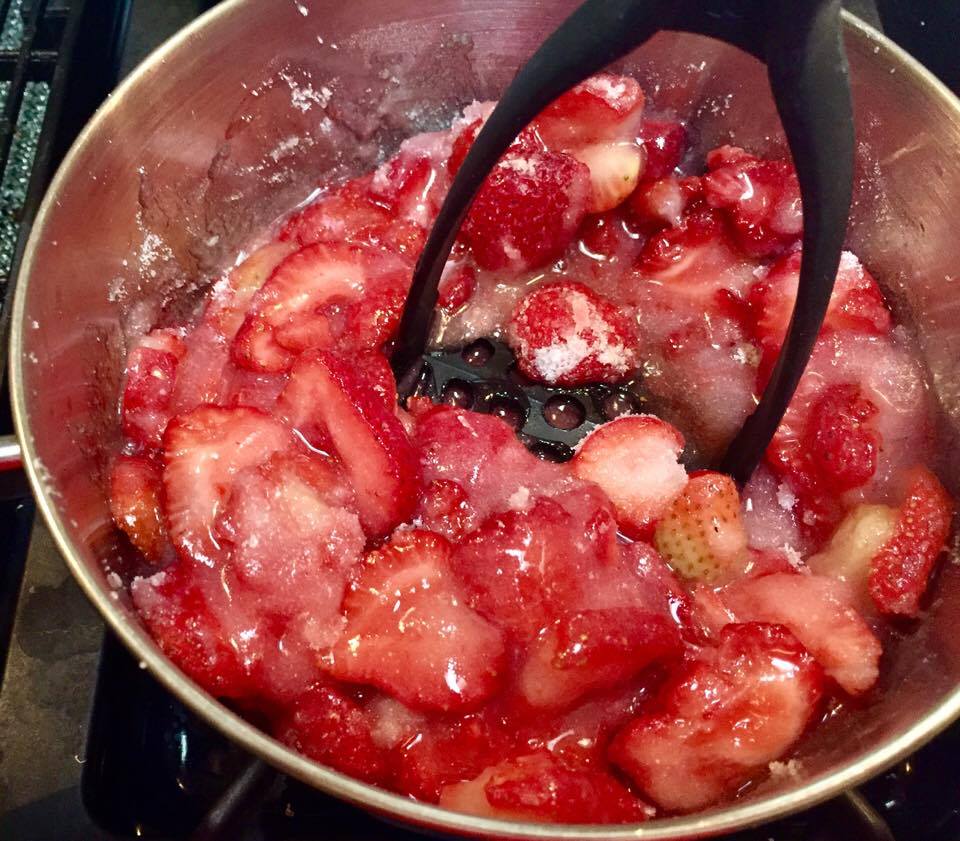
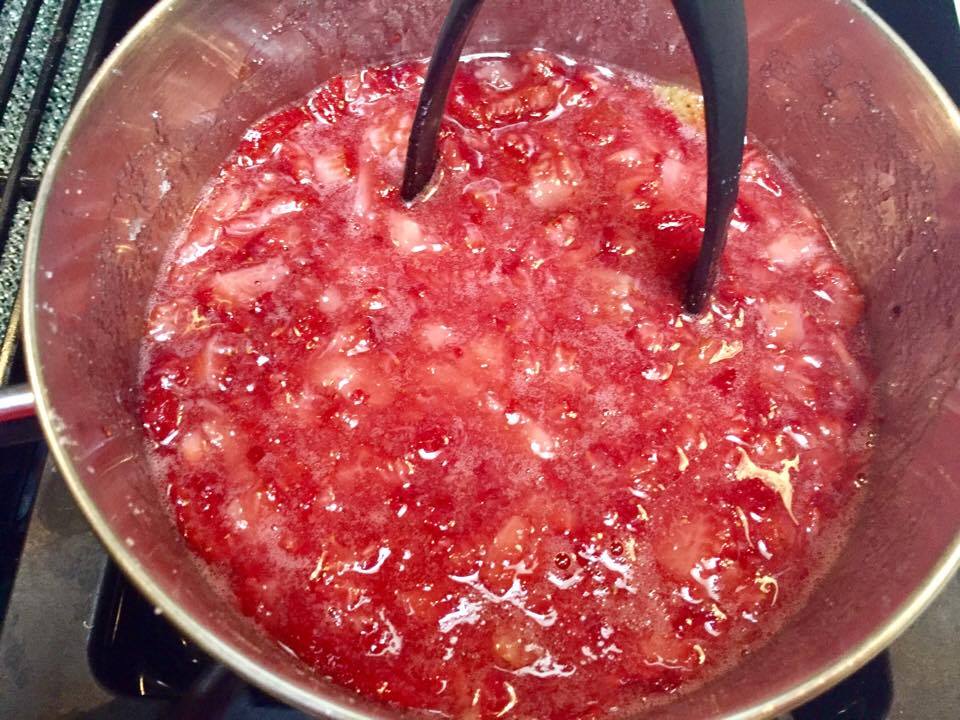
5) Place sliced berries in a 2 - quart saucepan and pour sugar/ pectin mixture on top before heating. Mix thoroughly to coat all fruit. Turn heat under saucepan to medium high. You want the mixture to heat quickly and come to a boil. As the fruit is heating, mash and mix using potato masher until berries lose shape and a wonderful syrup is created, about 4 – 5 minutes.


6) Just before the fruit mixture boils, add butter to saucepan. This small amount of fat will reduce foaming and boil over. The small amount of butter will not affect the flavor or add fat content... we are talking 1⁄2 - 1 teaspoon in a saucepan of one to two quarts of jam!
7) As berries come to a boil be careful not to overcook and destroy the pectin/gel formation. When the jam starts to come to a rolling boil around the edges, continue mashing and stirring for ONE minute. Reducing the heat a bit will help reduce spitting or spattering of jam, as long as you still maintain a boil. After boiling time is up turn off heat.
8) Using a slotted spoon, pull foam on top to side of saucepan Be careful as it will be very hot and sticky! I usually use the slotted serving spoon from my flatware set. Carefully remove as much foam as you can, but not the jam. The foam still has a great flavor and I often use this on some toast. No sense wasting it!


Jar assembly time!
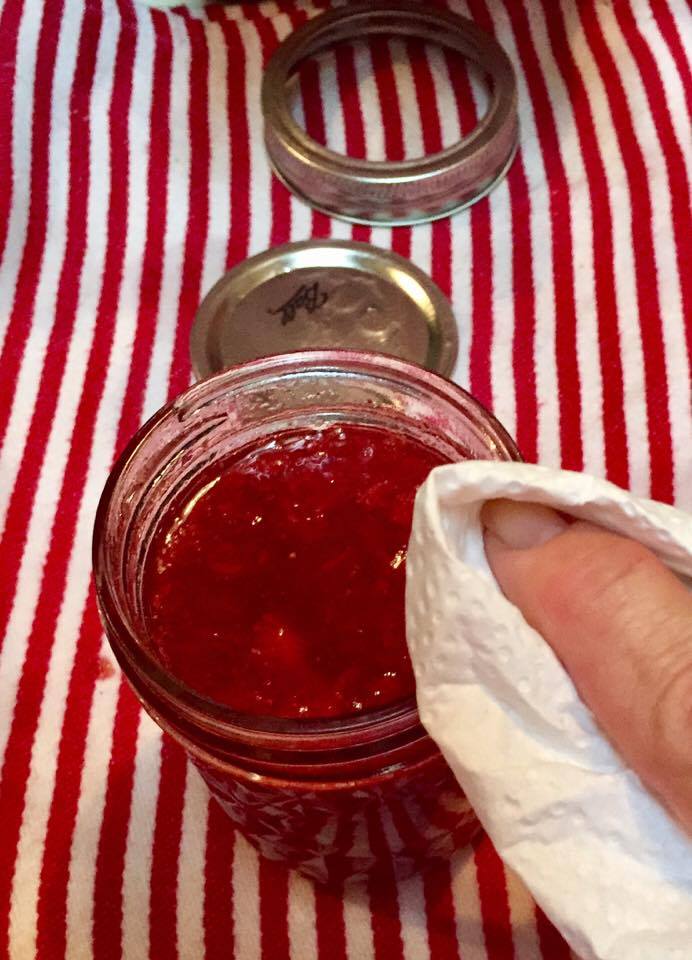
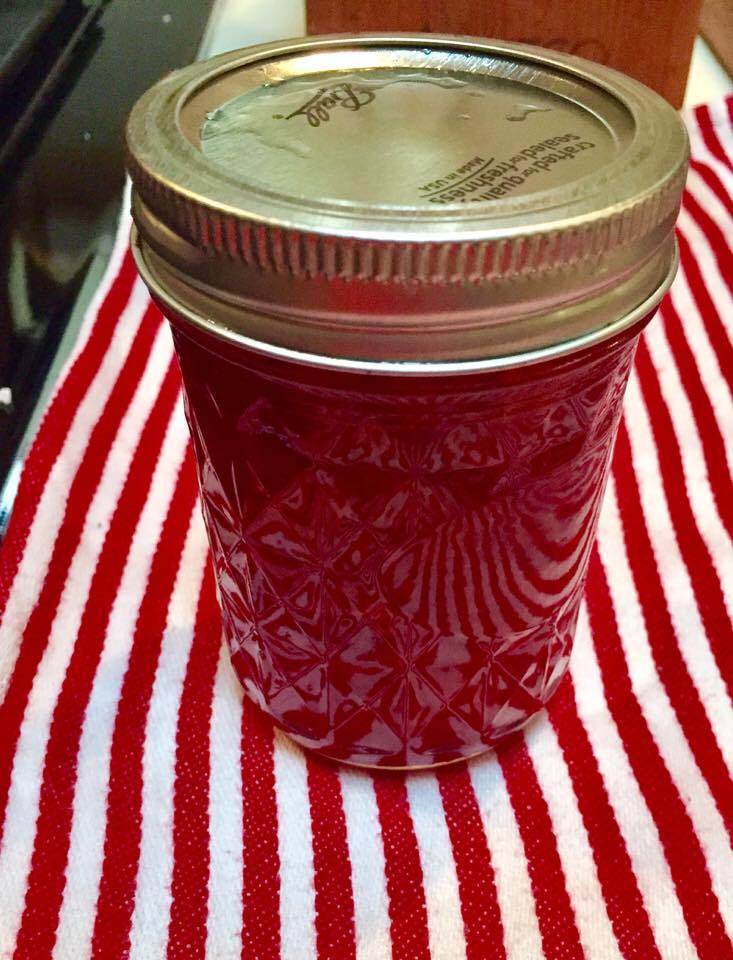
9) I create an assembly line with hot water bath of jars on the stove and a tea towel for filling jars next to them. Carefully lift a hot jar from water bath with a jar lifter or tongs and carefully pour all water out. Set it on a tea (or paper towel) and place wide mouthed funnel on top , as shown. Using smaller ladle, scoop jam and carefully pour in hot jar. If not using a funnel take care not to spill jam down sides of jar. Fill jars to the bottom of the funnel edge or 1⁄2 inch head space from top of jam to jar top. Remove funnel and carefully wipe upper lip of jar to remove spilled jam. Lift lids from hot water bath and place carefully on top of jars, then add metal ring. Using a potholder, tighten wire ring around jar. Doesn't have to be super tight, as this can be done once they cool a bit. Lift jar using ball jar lifter or potholder to a space away from heat.

Continue this process until all jars are filled and sealed. As the jars start to cool you will hear a popping noise as the suction sucks down the lid. After an hour or so, check seals by pressing down on top of lid with your finger. The pressed metal lid should not click when pressed. This shows you have a sanitary, sealed product. If for some reason it doesn't seal, refrigerate that jar and use first.
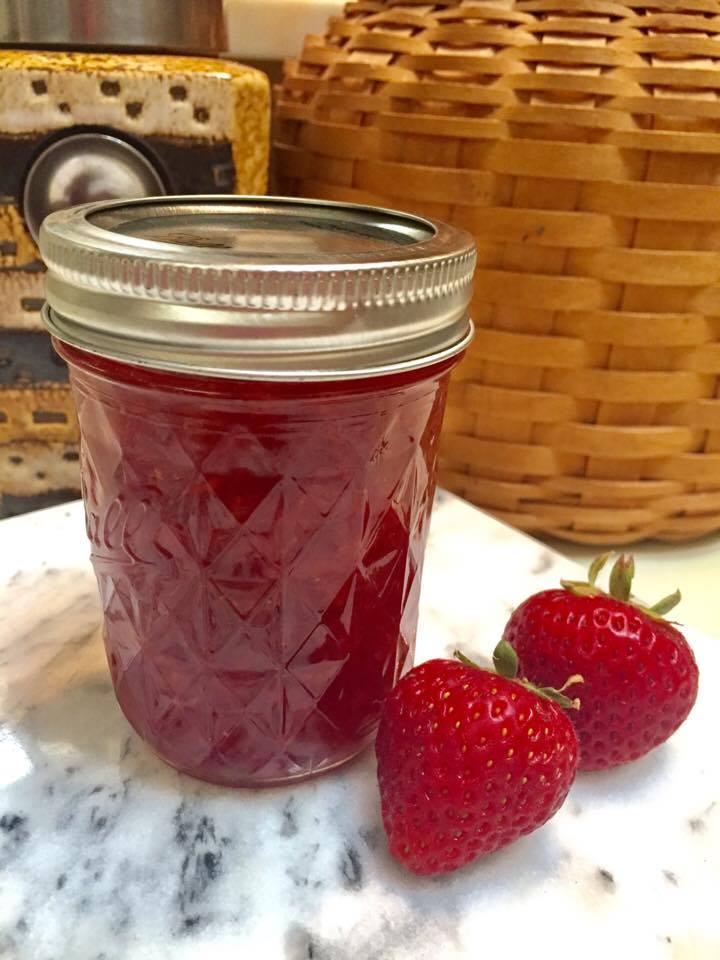
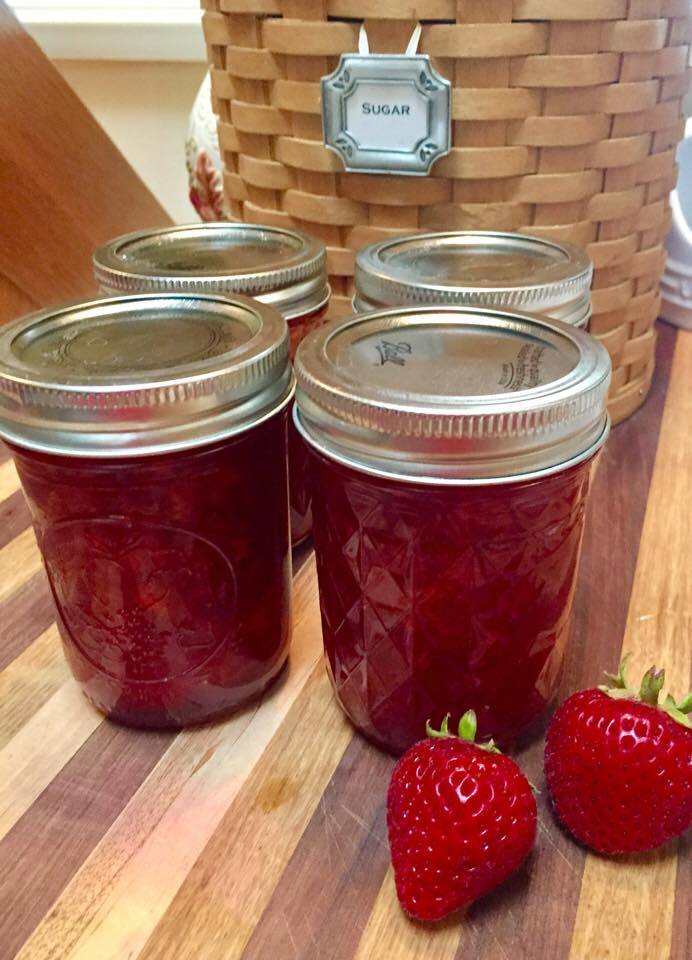
YES!! You have just made your first jar of homemade jam! You can use other fruits to make a variety offresh preserves too! They make wonderful gifts as well... think how impressed your friends and familywill be! Make some toast, biscuits or pancakes from my recipes… Enjoy!!